You can read more about our kitchen project at the start here, a list of what we did and some in-process working photos.
Only (ahem) weeks after promised, here are before and after shots of our kitchen. Truth be told, we're still missing the final quarter-round trim along the bottom of the cabinets and base so we're not 100% finished. But we'll call it darn close.
before...
and after...
Our main goal with the choices we made was to have a bright, classic/neutral, durable, functional space that we could still be happy with in 18 years. We wanted to do absolutely as much of it ourselves as we could (which is why it took 5 months) to learn, appreciate and save some moolah. We were lucky that the previous owners had semi-recently updated all of the appliances and while they don't necessarily match each other they're in great shape and work perfectly so we didn't mess with them.
A few of the specifics:
The counters were really what spurred this entire project. They were very old plastic laminate with quite a few chips and stains - not to mention an awkwardly placed built-in cutting board an in-counter blender (a big metal plate with a button - when you pushed it a 30 year old broken blender popped up!) The counters had to go. There are obviously a lot of counter material options out there. Our absolute favorite is white marble, however its known to stain and these puppies needed to be ready for the long-haul. We didn't find a granite we were crazy about (we like a very monolithic look without a lot of grain/pattern to it) so it came down to solid surface (like Corian) or quartz/engineered stone. We really wanted a medium gray and had a hard time finding the right color in solid surface. Quartz is extremely hard and durable (again, looking for the long haul) and we ended up finding the perfect concrete-like gray.
It bugged us that the existing sink was not centered on the window - it was almost - but off enough that we noticed it. Also a personal preference, but we didn't like a double-bowl sink. We used one side 90% of the time and rarely touched the other. We had seen the Kohler Indio sink in a showroom before we even owned a house and declared it the perfect, most amazing sink ever. One big, beautiful basin with an offset faucet and drain. Extra bonus was that the offset faucet hides the fact that the sink isn't centered! This sink isn't crazy expensive - but it isn't the cheap basic model either. The quartz counters had to be cut to a specific sink dimension, meaning we were committing to a sink for as long as we have these counters (which is going to be a loooong time) so we decided it was best to go with what we really, really wanted. We were jazzed when this guy arrived.
The tile is matte white from American Olean's Profile collection. A very, very basic 3"x6" subway tile. We also purchased the coordinating edge trim pieces for our window sill. We decided to use a gray grout (I believe it's Delorean Gray from Home Depot.)
Heck yes that's a bottle of whiskey up there. Along with a few of my cookbooks that I wrapped in brown paper after seeing an image of something similar on Pinterest.
The floor is Johnsonite Linoleum. 'Lineoluem' has mistakenly been used to describe any sheet good flooring - when the majority of the products people are referring to are actually vinyl. Linoleum is a material that was used a lot in the past - it's being used more and more now as people chose it for the sustainable qualities (it's made with 95% natural materials like flax, wood, linseed oil and limestone) and the fact that it's very durable. We chose a medium gray that has a slight marbled pattern of lighter and darker grays and we've been really happy with it. Completely surprised at how good it is at hiding everything - our floor looks deceivingly clean even when it isn't quite so.
So many of the kitchen inspiration images I had pulled together had glass front cabinets. We didn't want to replace our doors so we got quote from a local cabinet company to retrofit our existing doors with glass. It came back around $230 (higher than we expected) - so we took a chance and tried it ourselves. My husband carefully removed the center panel (we tested this on one of the cabinets we had removed just in case). I had glass cut from Lowe's and put it in with clear silicone and added a little wood trim inside (email me if you want more info.) We were happy with how they turned out - and it was only $30!
That's the long-winded kitchen scoop. Let me know if you have any questions or would like more information!
Showing posts with label this old casa. Show all posts
Monday, January 2, 2012
Wednesday, November 16, 2011
the kitchen project : evidence
A better blogger would have done the dishes before taking the official before photo. And probably put these photos in a more story-telling order.
Same corner, three different looks!
Stay tuned for the final result!
Tuesday, November 15, 2011
the kitchen project : what we did
I've struggled with how to share the scoop on our kitchen renovation. I started to go all Young House Love and write entire posts about every single decision we made. Which, on the one hand, would provide solid blogging content for the next four months, but on the other hand would probably drive everyone away (I just can't spell it out as well as the YSL crew!)
So this is the process post. With a list of everything we did (and what we hired someone to do) and next I'll do a post of progress photos.
For the dramatic effect of keeping you all on your toes, I'll post the finished product in yet another post. For the drama or for the fact that I haven't taken final pictures yet. It's one of those.
What we did (in order):
1. Ripped down the sexy coffee-house cartoon border. It took about 46 seconds because they put it up with a child's glue stick.
2. Ripped out the wall of cabinets above our stove - along with the microwave. I hate microwaves and I'm determined to never have one again. This microwave was giant and sitting way to low over the stove. Peace out radiant lover.
3. Painted the upper cabinets white.
4. Realized we used the wrong kind of paint on the upper cabinets. Stripped, sanded and primed every single one.
5. Painted the upper cabinets white.
6. Ripped out the plastic laminate counters.
7. Hired some nice young men to come and install new quartz counters.
8. Hire another nice man to come patch the wall where the previous owners had chipped out all of the plaster to put in the old counters. And also shot at the walls with a machine gun by the look of it.
9. Painted the walls.
10. Ripped out the fake-wood/laminate floor. Completely didn't match the rest of the house and was a floating floor (meaning not glued down) on a non-level substrate. So it was bouncy and needed to go. This took us 20 minutes - heck yes on the not being glued down.
11. Tiled the walls, backsplash and window sill. This literally took us over 30 hours spread over a few weekends but it was important to us that it was done carefully (we worried anyone we hired would rush vs. measure and level every damn tile). I tiled while my husband used the tile saw. Then I grouted while he went behind and cleaned. Probably my favorite part of the whole kitchen project and so happy with how it turned out.
12. Had the floor installed. We chose old-school linoleum (not vinyl floor that people call linoleum) This is a product that used to be used a lot - it's made from cork, linseed oil and jute.
13. Covered the asbestos encasedstripper pole radiator pipe with a paintable wallcovering. Much easier/safer than the process of cutting it out.
14. Retrofit some of our cabinet doors with glass fronts (this does deserve a post of it's own as I did it by myself in an afternoon for $30 after a cabinet company quoted us $250).
15. Hung a stainless steel shelf over the stove.
16. Replaced all of the dingy, unmatched outlet covers with stainless steel.
16. Removed the ceiling fan that hung way, way to low in the room. I'd love to say we then put a finished plate over the whole, but to be honest there is still a hole in the middle of our kitchen ceiling.
Things that we still need to do:
-put trim back on the cabinets at the floor and re-install the transition strips in the doorways.
-install the new glass cooktop after I leaned on ours while tiling and cracked it. sonofa.
-eventually replace the lighting - very cheap track lighting that we don't love but it's not terrible. Someday.
Next up, progress photos!
So this is the process post. With a list of everything we did (and what we hired someone to do) and next I'll do a post of progress photos.
For the dramatic effect of keeping you all on your toes, I'll post the finished product in yet another post. For the drama or for the fact that I haven't taken final pictures yet. It's one of those.
What we did (in order):
1. Ripped down the sexy coffee-house cartoon border. It took about 46 seconds because they put it up with a child's glue stick.
2. Ripped out the wall of cabinets above our stove - along with the microwave. I hate microwaves and I'm determined to never have one again. This microwave was giant and sitting way to low over the stove. Peace out radiant lover.
3. Painted the upper cabinets white.
4. Realized we used the wrong kind of paint on the upper cabinets. Stripped, sanded and primed every single one.
5. Painted the upper cabinets white.
6. Ripped out the plastic laminate counters.
7. Hired some nice young men to come and install new quartz counters.
8. Hire another nice man to come patch the wall where the previous owners had chipped out all of the plaster to put in the old counters. And also shot at the walls with a machine gun by the look of it.
9. Painted the walls.
10. Ripped out the fake-wood/laminate floor. Completely didn't match the rest of the house and was a floating floor (meaning not glued down) on a non-level substrate. So it was bouncy and needed to go. This took us 20 minutes - heck yes on the not being glued down.
11. Tiled the walls, backsplash and window sill. This literally took us over 30 hours spread over a few weekends but it was important to us that it was done carefully (we worried anyone we hired would rush vs. measure and level every damn tile). I tiled while my husband used the tile saw. Then I grouted while he went behind and cleaned. Probably my favorite part of the whole kitchen project and so happy with how it turned out.
12. Had the floor installed. We chose old-school linoleum (not vinyl floor that people call linoleum) This is a product that used to be used a lot - it's made from cork, linseed oil and jute.
13. Covered the asbestos encased
14. Retrofit some of our cabinet doors with glass fronts (this does deserve a post of it's own as I did it by myself in an afternoon for $30 after a cabinet company quoted us $250).
15. Hung a stainless steel shelf over the stove.
16. Replaced all of the dingy, unmatched outlet covers with stainless steel.
16. Removed the ceiling fan that hung way, way to low in the room. I'd love to say we then put a finished plate over the whole, but to be honest there is still a hole in the middle of our kitchen ceiling.
Things that we still need to do:
-put trim back on the cabinets at the floor and re-install the transition strips in the doorways.
-install the new glass cooktop after I leaned on ours while tiling and cracked it. sonofa.
-eventually replace the lighting - very cheap track lighting that we don't love but it's not terrible. Someday.
Next up, progress photos!
Monday, August 8, 2011
the kitchen project
At the beginning of this summer we decided to take on the biggest renovation project we've done (and probably will ever do) on our old house. The kitchen.
Dun dun dun.
I think we figured it was one, maybe two month project. We're currently going into month three. We also figured we could do the entire thing without really losing the ability to use the kitchen. That is hilarious. We haven't used the stove/oven/sink in a solid five weeks.
I'm going to break the renovation into a couple of more detailed posts, but here's the background.
This is our kitchen ala sketchup. For a little context, the door on the left goes to our hallway/backdoor, the door on the right goes to a small butler's pantry and the top door heads down the hall to the dining room/rest of the house.
Things we liked: the big window, plenty of storage, the general layout and the appliances.
Things we didn't like: the crazy wallpaper border, chipped old counters, all of the black cabinets (too dark!) mis-matched/inconsistent tile backsplash, the ceiling fan, low microwave over the stove and the flooring (fake laminate). So a few things.
It started with the 1970's laminate counters. They were chipped in a few places and had a 'built-in' cutting board in a strange location. And the highlight? The in-counter blender. It just looked like a random metal plate until you pressed a button and a 30+ year old blender popped up. It didn't work, ate up the entire cabinet beneath it... and meant we kept a wooden cutting board strategically placed over it at all times. These counters had to go.
The problem with projects like is the way they steamroll from 'we need to replace these counters' to ...
While we're replacing the counters, we should do the backsplash too.
While we're replacing the counters and tile, we might as well replace the sink.
Since we're taking down the border, we should paint.
Since we're painting, we should go ahead and paint the cabinets.
If we're messing with the cabinets, we should rip out the ones we don't like.
If we're doing all of that work, we might as well get rid of the floor.
and voila - you've pretty quickly signed yourself up for a summer project.
So here is the before shot (heaven forbid we do the dishes before taking photos) :
Stay tuned for our first steps...
Monday, April 18, 2011
layered diy art
While doing a little guest room prep this weekend (woohoo for friends coming to stay), I decided the guest bathroom needed a little something to pep it up. That being said, guest bathroom artwork is not at the top of our very long wish-list for home purchases, so I got a little crafty.


In borderline-hoarder style I had held on to this tissue paper from a gift for quite a while. I wasn't sure what I'd do with it, but couldn't bear to part with the little birdies. Luckily we had an unused, random frame to fill. I used three layers of tissue paper, slightly shifting each (and flipping the middle layer backwards) simply wrapping a piece of cardboard, taping each piece in the back...

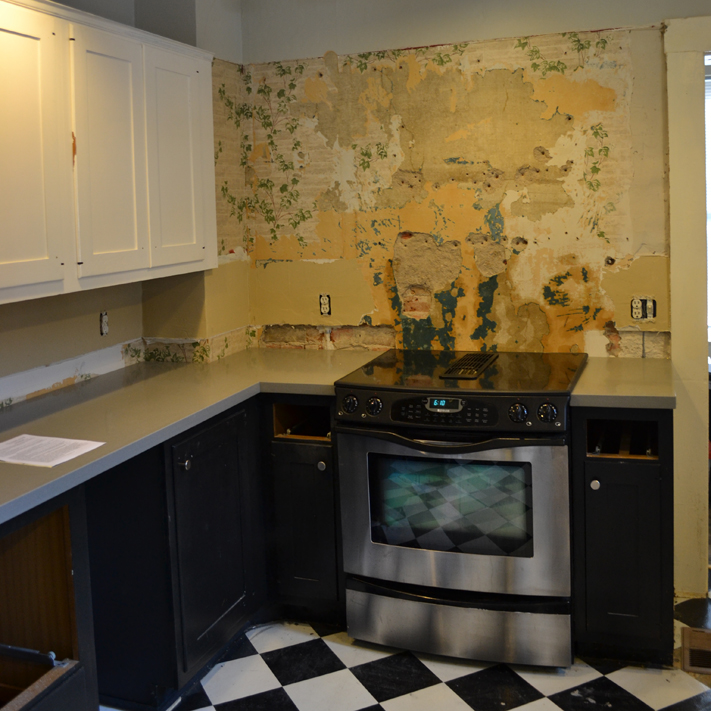
What's that? The wall behind the frame looks like painted, wrinkled wallpaper? Oh don't be silly. It's our house. Of course it is.

and voila! Cheers up the little bathroom and hides about 42 nail holes. Seriously you'd think the previous homeowners just ran around with a hammer and nail playing... some game that involves those things and lots of holes in the wall. If you know that game, I don't want to play.

Monday, April 4, 2011
one day window

My bathroom has (for a bathroom anyway) a very large window. At some point a previous owner installed this greenhouse window-thing with shelves and little ventilation holes and the whole shenanigans. Which is great. Except for the part where I don't like my neighbors to watch me when I'm in the bathroom. Just a personal choice. Sooo the clunky/heavy blinds stay closed pretty much all the time. Which makes the otherwise-lit-with-two-little-sconces bathroom pretty dim.
This morning I commented to my husband that if we could just apply some quick frosted film then I could leave that puppy open all the time. And even (gasp) put a little plant out there. I'm not good with plants - kind of a death sentence to come live with me. I don't know what it is, I make a valiant effort. I digress.
.
.
One quick trip to Home Depot, $20 and 2 hours later - we had a frosted window. You can see the top almost skylight-type portion we left un-filmed. The only thing that's visible out of it is trees (no neighbors) and this way if I do decide to have/kill plants they still get a little sun. We used the Gila privacy frosted film. I was worried going in that this could be a disaster that ended up looking like we superglued plastic wrap to the windows, but luckily I was wrong and it went up pretty easily (we followed the directions. yay!)
Once we had the film up we decided the blinds weren't really necessary and the whole window looked much happier without them. A little screwdriver action and voila! It seriously feels like a new bathroom, so bright and cheery- and bigger! Now we just need to work on the multiple layers of painted wallcovering surrounding the window... but that is for another day.
*sorry for the ehh photos - it's hard to photograph in a bathroom...
Saturday, February 19, 2011
before and kindofafter


The week before Thanksgiving, my husband and I got really ambitious and decided we should do a quick room re-do in our library to get ready for entertaining over the holidays. When you say 'quick project' in an old house, the old house laughs at you and jinxes the bajeezus out of you because it's been around a long time and it's all 'oh hell no we don't do things fast around here.'

So now it's February. The project is basically done except for the furniture and getting things on the walls. But as far as giant-mess-good-god-what-have-we-done, the project is done.
As I've mentioned before, every square inch of our walls and ceilings are covered in wallcovering. In some rooms, we have stripped it down (and subsequently had to have the walls refinished before painting) and we've painted over it (which is basically a giant sin in my book...but we'll just have to go to renovation-confession.) We went into the library project thinking we'd paint over, but when we started finding too many peeling/cracking/loose pieces we decided the right thing to do was take it down. Layer numero uno was down in a flash. Um layers 2, 3 and 4? Had to be chiseled off in tiny quarter-sized chips. It. took. forever.
.

.
Once it was down (the week of Christmas) our favorite wall-guy came over and refinished the walls. This left us with a clean slate. When choosing a color, my husband made one request: no gray. Yikes. I told him there was only one color I could imagine besides gray... and that was an uber-saturated, jewel-tone blue (see some color inspiration) and luckily he was on board. In all honesty the finished color is not as dark as we were thinking, but it's close enough (and we're tired enough) that it's going to stick around for a little while.
So we painted. Once the walls were painted I realized how much it drove me crazy that the bookshelf paint did not match the trim paint (for shame previous owners, for shame) it took two different cans of paint and 16 hours of painting, but they were finally righto.
.
.
While the rest of our house has some form of original crown molding, this room's had been taken down at one point and replaced with a thin little trim piece (which was broken in spots) and a painted band to attempt a little trim-trickery. Not cool. We took down the thin trim piece and the band was obviously removed with the wallcovering. We found a stock profile at Home Depot that went well with the rest of the trim (a custom carved profile to match the house's original trim would be awesome...but so would paying our mortgage. so no.) Once the paint was finished we tried our hand at trim carpentry (yikes- we're not quitting our day jobs anytime soon) but the trim is up despite many hours of 'how is nothing square/level/even in here!?' breakdowns. You can also see our grasscloth ceiling in these images - luckily we love it, it's in great shape, and it's staying put!
Wow. So much rambling. Here more before and kindofafterbutnotquitedone photos.
.


.
Now we just need to work on artwork (wall art inspiration) and our ideal furniture. The current arrangement feels stiff and out of scale (this big daybed, lamp and drafting table are all on the wish list.) All in good time.
.

.
And that's the end of the Thanksgiving project that took a little longer than expected. We're excited for this room to be the cozy reading/hangout spot we know it wants to be.
Tuesday, January 4, 2011
2011 : the year of projects
I have my new year's resolutions, but they are fairly boring and typical (the whole be healthy/tidy/positive yada yada.)
BUT my goals for 2011. My to-do list. Most of what I want to accomplish.
All revolve around this house.
Its been interesting that the longer we're in this house the more we get each room and it's purpose, the way it functions for us and what we want it to be. In some rooms that's a coat of paint (in theory - famous last words) and in others its full-on overhaul from top to bottom. The problem is that the more we understand and make plans the more I want to get started! I'm excited to see the progress and learn more about the process. Of course that takes time and moolah so we need to take things one step at a time.
In the rooms we want built-ins I am all over Ana White's website and am determined that my husband and I can tackle some of these and become quite the handypeople. Have you ever tried any of her pieces? Any home projects on your plate for 2011?
.

.
Original photo by Michael Paul Photography via French by Design. I doctored the blue book (it was green) to reflect my current perfect color scheme:)
Saturday, December 18, 2010
a little silver

.
Our finished dining room walls are filled with old family photos. We want the dining room to be the center of our house and all about family - so when we had an open wall that needed a little something I had to put my thinking cap on.
My sister has a set of silverware from my great aunt and the details on it are just amazing. I asked her if I could take one of the place settings (don't worry, we'll keep track of it in the family!) Right around the same time, my husband's parents offered us a set of silverware that had belonged to his grandparents. Again, gorgeous details.
Family china often gets displayed in china cabinets or on shelves but silver is always tucked away in the dark for a special occasion. We decided that finding a way to display this silverware would be a great tie into family history (and let's be honest - its silverware in the dining room - just a good match all around!)
.


.
I found two black shadow boxes at a local store and wrapped the back mounting material in a scrap from our dining room curtains. Then I arranged the place setting and used dress pins to hold each piece in place. This was a balancing act, more than once I would gently pick up the frame only to have the knife slide out 2 seconds later. But with enough pins and finding the right pressure/locations - they stayed in place. I also taped a small piece of 3M's silver protective strips inside the frame to keep the silver from tarnishing.
.

.
And voila, our wall is happily filled with a piece of our family history.
Monday, November 29, 2010
thanksgiving

I hope you had a wonderful thanksgiving! We hosted for the first time and despite a few little glitches (um my pies had to cook for 2x the amount of time recommended?) I think it turned out pretty well. Of course setting the table was one of my favorite parts. In full disclosure I stole the pear idea from Martha Stewart:)
.


.
Have you recovered from your mashed potato coma?
Sunday, November 14, 2010
no such thing as a coat of paint
When you're in an old house at least.
.
This morning I woke up and decided that I finally wanted to get our library (we call it that because it has bookshelves and we're not sure what else to call it) completely painted. asap. Our game plan is to set up our Christmas tree in the library. And because we're hosting Thanksgiving at our house, we thought it would be fun to have the tree all set up to really set that holiday feeling.
But of course, I want the room to look fabulous with said tree.
So it needs to be painted.
We had already decided that the crown molding was going to need to be replaced in this room (long story I'll get to in the before/after...whenever that happens.) So we take down the crown molding. We had also decided that this would be one of the rooms where we painted over the wallcovering (read my whole argument for whether or not it should stay here) but upon further review this morning we came to the conclusion that the 'right' thing to do would be to get the wallcovering down - even if it meant having to refinish the walls behind it.
We started to rip. We discovered that these walls are paint on top of vinyl wallcovering on top of three layers of paper wallcovering. The first wall was a 'typical' one as far as wallcovering removal - meaning it was a total pain in the rear and difficult to get down.
Then we get to wall #2. And the wallcovering basically falls off in our hands.
Hmm.
And the oldest layer of wallcovering is damp.
So this is an awesome sign.
.
We have (at a minimum) two professionals that we'll need to bring in at this point.
And needless to say, pretty sure that Christmas tree will not be set up by Thanksgiving.
.
Pandora's box of old houses.
.
This morning I woke up and decided that I finally wanted to get our library (we call it that because it has bookshelves and we're not sure what else to call it) completely painted. asap. Our game plan is to set up our Christmas tree in the library. And because we're hosting Thanksgiving at our house, we thought it would be fun to have the tree all set up to really set that holiday feeling.
But of course, I want the room to look fabulous with said tree.
So it needs to be painted.
We had already decided that the crown molding was going to need to be replaced in this room (long story I'll get to in the before/after...whenever that happens.) So we take down the crown molding. We had also decided that this would be one of the rooms where we painted over the wallcovering (read my whole argument for whether or not it should stay here) but upon further review this morning we came to the conclusion that the 'right' thing to do would be to get the wallcovering down - even if it meant having to refinish the walls behind it.
We started to rip. We discovered that these walls are paint on top of vinyl wallcovering on top of three layers of paper wallcovering. The first wall was a 'typical' one as far as wallcovering removal - meaning it was a total pain in the rear and difficult to get down.
Then we get to wall #2. And the wallcovering basically falls off in our hands.
Hmm.
And the oldest layer of wallcovering is damp.
So this is an awesome sign.
.
We have (at a minimum) two professionals that we'll need to bring in at this point.
And needless to say, pretty sure that Christmas tree will not be set up by Thanksgiving.
.
Pandora's box of old houses.
Monday, November 1, 2010
make me a closet

We have two bedrooms that do not have closets. Husband and I have talked about ways we could add closets without looking like an added on closet. One idea we came up with was something along these lines, build out a wall around a doorway and make it all be entirely built-in, matching trim etc. A project for someday...
via Interiors Porn
Tuesday, October 19, 2010
the dining room : after
This morning you heard the scoop on how we stripped this room down and saw the before photos. Now we were ready to dress it back up. Anyone who has read this blog for a while can probably guess what color we went with...
.


.
For our entry we had found our perfect light, airy, not-too-pink-or-blue-or-purple-or-green gray and we decided to use the same color on the top half of the dining room. Since we had taken down the chair-rail to refinish the walls, we technically didn't need to divide them up again, but we liked the idea of bringing in a darker color on the bottom. Oh that darker color... the bane of my color-choosing existence. Husband and I agreed we wanted a very dark charcoal gray - dare we almost say black? The first coat/can of paint was a weird purply-red black that we hated. The second was navy blue. We took that can back to Sherwin Williams and asked them to just dump all the black pigment in there that they could. And the third time was a charm (admittedly in some light this still shifts a little navy but we're learning to deal.)
.

.
While the majority of the walls had been that strange concrete material, our fireplace was the original plaster and we actually fell in love with the raw, distressed look and decided to leave it as is. Yes, almost every guest we've had over asks 'when are you going to finish the fireplace?' but we're smitten.
.

.
After we had taken down the heavy curtains we were amazed at how much light came into the room...and how much we felt like we were eating dinner in a fishbowl. I ended up ordering a sheer fabric from one of my favorite commercial manufacturers Maharam (we used Diffuse 003 Vanilla.) Sewing nine-foot long curtains turned out to be quite the feat/learning process and I hope no one ever looks closely at the sewing, but we're happy with the result (still lots of light while dissolving the views.)
.
.
Something we knew we wanted to incorporate in this room before we even had house keys in hand was a wall of family photos. We pulled together some of our favorite family photos and framed all of them in black/white/silver frames. I'd love to say that I have a magical eye and just popped all of these onto the wall, but it actually took an initial layout in sketchup, then four hours of precise measuring, leveling and placing to get them up.
Soooo that's our first before and after in the new house! Luckily this one has taken me so long to post about that we've actually finished another room, so expect the next install soon!
.


For our entry we had found our perfect light, airy, not-too-pink-or-blue-or-purple-or-green gray and we decided to use the same color on the top half of the dining room. Since we had taken down the chair-rail to refinish the walls, we technically didn't need to divide them up again, but we liked the idea of bringing in a darker color on the bottom. Oh that darker color... the bane of my color-choosing existence. Husband and I agreed we wanted a very dark charcoal gray - dare we almost say black? The first coat/can of paint was a weird purply-red black that we hated. The second was navy blue. We took that can back to Sherwin Williams and asked them to just dump all the black pigment in there that they could. And the third time was a charm (admittedly in some light this still shifts a little navy but we're learning to deal.)
.


While the majority of the walls had been that strange concrete material, our fireplace was the original plaster and we actually fell in love with the raw, distressed look and decided to leave it as is. Yes, almost every guest we've had over asks 'when are you going to finish the fireplace?' but we're smitten.
.


After we had taken down the heavy curtains we were amazed at how much light came into the room...and how much we felt like we were eating dinner in a fishbowl. I ended up ordering a sheer fabric from one of my favorite commercial manufacturers Maharam (we used Diffuse 003 Vanilla.) Sewing nine-foot long curtains turned out to be quite the feat/learning process and I hope no one ever looks closely at the sewing, but we're happy with the result (still lots of light while dissolving the views.)
.

.
Something we knew we wanted to incorporate in this room before we even had house keys in hand was a wall of family photos. We pulled together some of our favorite family photos and framed all of them in black/white/silver frames. I'd love to say that I have a magical eye and just popped all of these onto the wall, but it actually took an initial layout in sketchup, then four hours of precise measuring, leveling and placing to get them up.
Lastly we added our finishing touches. The fireplace has a print from Design Within Reach, two silver candlesticks (family heirlooms) and an antique seltzer bottle my mom found at a flea-market about 15 years ago. The built-in holds some family china as well as our napkins and placemats.
Soooo that's our first before and after in the new house! Luckily this one has taken me so long to post about that we've actually finished another room, so expect the next install soon!
Subscribe to:
Posts (Atom)